Wednesday, December 17, 2008

REPOST:How to Make a Painless Needlefelt Ornament!

This "Painless Needlefelt Ornament" tutorial by Morgan of EwesYourImagination is so GREAT that I thought I would repost now at Christmastime for everyone to enjoy.

Hi! I am Morgan, a.k.a Ewes Your Imagination, a proud member of the NFEST team and the Felting Forum. I asked my mom if she would be the guinea pig for this tutorial, and she happily agreed! About 15 minutes into the project, we had already altered some things, and she was quickly tiring of the stabbing process! Now that I think about it, Dr. Phil was on, and she seemed to be listening less to my instructions and more to the television. I came home and realized there was no way of simplifying all the changes we made, so I sat down and start to finish did this tutorial like I originally planned.

If you have ever pulled out your wool and needles around people who haven't heard of needlefelting, you probably get the same question I get, "Can you teach me?" My answer is usually "No," not only because I am a lousy teacher, but also knowing how much damage a sharp, downward-barbed needle can do to one's fingers. So I hesitate to let the interested kids (and some adults!) I know start stabbing. How do you share the joy of your craft, without sharing the pain?

I wanted to make a Christmas ornament with my mom, who doesn't have any needlefelting experience yet, and thought a good template, or stencil, would be a cookie cutter! I remembered all the fun cookie cutters we used growing up, most of them in Christmas shapes. So we found the standard Gingerbread Man cookie cutter and started stabbing away! The high walls were perfect to run the needle straight up and down without having to put your digits in harm's way.

So if you want to get someone with tender, innocent fingers started in this fun and addictive craft, try some things you have in your house first, and in no time they will pick up the basics of needlefelting.

1) What you'll need: felting needle (I used a size 40), foam,
cookie cutter
with no bar across the top, various colors
of wool roving depending on what you are making.


2) Put your cookie cutter on your foam work
surface, and start laying wool over the top, being
sure to lay wool over the edges, and in different
directions.


3) Push the wool down, and keep adding
more wool until the cookie cutter
is loosely filled with the roving.


4) Start pushing the needle straight up
and down along the perimeter of the
cookie cutter, and continue all the way around, leaving the middle for later.


5) Before you go any further, it's good to
lift up the cookie cutter, and pull the wool
off the foam, so it doesn't get too stuck in
the foam. If you've felted all the way
around the inside edge, it should
hold it's shape well.


6) Now, push the wool back into the
cookie cutter and felt all the wool
in the middle down until it is uniformly felted.


7) Now you can remove the cookie cutter and you should have a semi-firm felted shape.


You can start adding details any way you like, I chose to use
the standard Gingerbread Man embellishments.


You could embellish with beads, sequins, embroidery, or anything you feel like! To make these into hanging tree ornaments, simply sew a loop of thread near the top and tie a knot. Metallic thread looks good for this. The snowman at the top of the page was made using the same cookie cutter, but my mom added some length to the legs after step 6, then gently wet felted, dried and shaped the whole body until it was what she wanted. Then she and I added the carrot shaped nose, and the black eyes and mouth. It resembles a primitive snowman doll she found a while back, and I can't wait to make more!

Also, if you are helping teach someone who is either really impatient, or just really young, you could skip most of the time-consuming steps, and just have them trace the body from a piece of pre-made felt, then just needlefelt the details. They would make good easy hanging ornaments, or even special tags to adorn presents. Happy Felting!

Sunday, December 7, 2008

NFEST November Challenge Collage

November 2008 Challenge Collage


Well, everyone must be really busy with all those handmade, eco-friendly Christmas orders! We only had one entry for our November Challenge Theme of "Earth, Wind, Fire and Water". Gerry of Gourmet Felted created this adorable Jack Russell Terrier digging deep into the Earth to find his long buried bone.

Gerry's shop is http://gfelted.etsy.com and this cutie is for sale! To see him directly click here http://www.etsy.com/view_listing.php?listing_id=18103215

Gerry's work will be in the February "Teddy Bear Review Magazine" which is on shelves now!

Since we only have the one entry, we have some space to learn a bit more about this talented needlefelt artist.

Bio~ORIGINAL ARTIST SCULPTURES~~MADE FOR YOU, FROM THE HEART~~ONE OF A KIND~by GERRY I love textiles! I love dogs! Put them together = needle felting, which is sculpting with wool. I've always been most happy expressing myself artistically. When I was a little girl, I even painted seashells...and yes, I DID sell them by the seashore!! I love knitting and working with textiles of every color and texture. It is most fun to sculpt a fluffy pile of wool into a dog. When a dog is created in a few hours, it is like a miracle! They are made from the heart and I put much love into each one of my creations. I get so much happiness from making these little dogs, and also from the joy that it gives others. People have told me that they have tears of happiness when they open the box and see their little replica of their pet.

Thank you, Gerry, for sharing a bit about you and entering our Team November Challenge with this dynamic needlefelted wool sculpture!

Monday, December 1, 2008

NFEST Team News

Hello! We have some team news to announce.

Orit started a new forum thread over on etsy to promote needlefelt items. If you get a chance, head on over to http://www.etsy.com/forums_thread.php?thread_id=5932318 share your needlefelt creations and check out what our team has been working on.

Congratulations to our two winners of the NFEST "Find a needle in a haystack" Contest! AlpacaFarmGirl and Rosapatientiae successfully submitted correct entries and were the two winners in our drawing. A big thank you to everyone who participated. We hope you enjoyed the needle hunt.

We have a lot of new members signing up almost daily. Welcome to all you needlefelting newbies!

Wednesday, November 26, 2008

felt candy cane tutorial

this is an easy and fast way to make felt candy canes, felting around pipe cleaners to create the shape. i first posted this tutorial on my blog, felt cafe; thanks gina for inviting me share it here!

no previous felting experience is necessary; this would be a lot of fun for older kids. for younger children, you could wrap the wool around the pipe cleaners and/or get them started, and have the kids do the last steps (roll them in soapy water).

this tutorial is a sneak preview of part of a holiday felt making kit that i will have in my etsy shop after thanksgiving. UPDATE 11/25: thanks to everyone who has commented, in response to popular demand, you can now purchase these felt candy canes from my etsy shop as a custom order. feel free to share this tutorial, i would like to please just ask that you credit me and the felt cafe blog, thank you!~

you will need some pipe cleaners (cut in half) and some wool roving. the amount pictured is about 1/8 of an ounce, which is enough to make at least 2 candy canes. you also need dish soap, hot water, a shallow waterproof dish, and a towel on hand.

take a strip of white wool. starting at one end, wrap the wool tightly around the pipe cleaner.

overlapping the wool, wrap the wool diagonally along the pipe cleaner, working your way to the other end.
make sure to completely cover the end.
wrap back in the other direction, making 2 layers. when you reach the first end, turn around and wrap a final 3rd layer of wool
completed 3 layers of white wool wrapped around half a piper cleaner. if you've wrapped it tightly, it will be easier to felt in the following steps. some unevenness in the layers of wool at this point will not be a problem.
take one strip of red wool roving, about 1 and a half times longer than the white wool wrapped pipe cleaner.
wrap the red wool once or twice around one end.

and then wrap the red strip diagonally along the length of the pipe cleaner, leaving white spaces that are the same width as the red spaces.
wrap the red wool one or two times around the end.
wool wrapping completed.

put a little hot soapy water in a dish, and roll the wool in it. using your fingertips or palms, roll the wool back and forth, as if you were making a clay snake.
the fibers will begin to join together. continue to roll the wool.
you can continue to work the wool: hold the stick in one hand as shown, and close your other hand around it. keeping your hands flat, rub it between your palms. you can keep working the wool as you gradually rinse out the soap.

your felt candy cane will probably have stretched a little past the wire and become longer. if you want flat ends, you can trip them off with a scissors, being careful to cut beyond the end of the wire.
bend to make a candy cane shape.

you can use the same process to make larger or smaller candy canes, or peppermint sticks (just don't bend them), or twist them into a circle for napkin rings or tiny decorative wreaths.

have fun, and i would love to hear any feedback!

Thursday, November 13, 2008

SALE! Original Needlefelt Fiber Art 11/22 11/23


The Needle Felting Etsy Street Team is proud to host their first Holiday SALE Great discounts all weekend - Plus,***CONTEST***WIN A FREE NEEDLE FELTING KIT OR AN Original NUSHKIE Fairy Art Doll! No purchase necessary. Everyone is invited to enter! Stroll through the shops on this post to find the Needle in the Haystack! More details at the bottom of this post.


Holiday Sale November 22nd and 23rd - All day.

Find the Felting Needle in the Haystack
And win the Needle Felting Kit Prize!
Just visit the shops with sales and look for the letters
N - E - E - D - L - E - F - E - L- T
in the descriptions of items for sale.
When you've found them, email the shop names in order
(example: fufukitty = N) to our team shop via etsy convo http://Needlefelt.etsy.com

Correct answers will be placed in a pool and
Two winners will be drawn at random. Winners will be announced on this blog. So stay tuned!

Thursday, November 6, 2008

NFEST Oct08 Challenge "Things With Eyes"


October's "Things with Eyes" Themed Challenge Entries are in! Beautiful, creative, and diverse. Thank you to everyone who thought about it, created these entries and shared your creations. The Needle Felting Etsy Street Team is proud to present this gorgeous collage. (To see a larger view, click on the image.) If you'd like to see more of these artist's creations, please click on the links below and stop in to see their shops.


Friday, October 17, 2008

Fridays feature - ewesyourimagination

Todays friday feature is

From today onwards the friday featured NFEST artists will be cross posted in the NFEST blog.
http://benmcfuzzylugs.blogspot.com


Any NFEST artist wishing to participate please post in this thread
http://feltingforum.com/phpbb/viewtopic.php?t=2669&start=15


What got you started needle felting?
I helped during the shearing of a local Shetland ranch, and was generously given a LOT of free wool, so I bought some needles and stabbed away!


How long have you been needle felting?
Only since March of 2008...I've come a long way and get better every time I poke!

Describe your style of work
Most of my things have oddly turned out sorta cutesy....that's odd because I'm more of a creepy, weird minded person when I start out on something. I've also just discovered how much fun wool "paintings" can be.

How do you promote your items?
I chat as much as possible on Etsy, in the forums, labs, and chat rooms. Then here on the forum, Flickr gets a lot of views, and I started a blog for fun! I just listed some specials on IndiePublic's Gift Guide too. Also, there are going to be NFEST members who will all hold a shop sale on the same November weekend which will be promoted in various ways.


What/who inspires you?
The huge pile of wool and my husband saying "Thats an awful lot of wool." Well, that inspires me to keep at it, but I have a wild imagination anyway to come up with most of my things.

Can you remember what the 1st thing you made was?
A very primitive looking sheep. Then immediately a grizzly bear that looked waaay better!


What are you working on right now?
A very creepy macabre vase, black and white with crimson red locks. I wet felted the main vase, and have needled "faces" into places. Creepy.

If you could only save one of your items from a fire which one would it be?
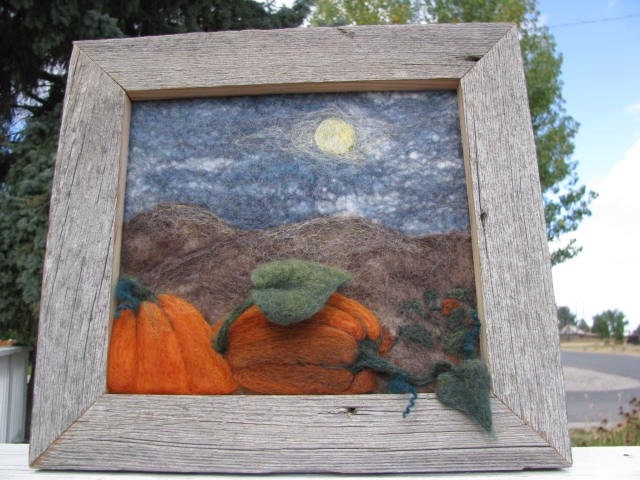
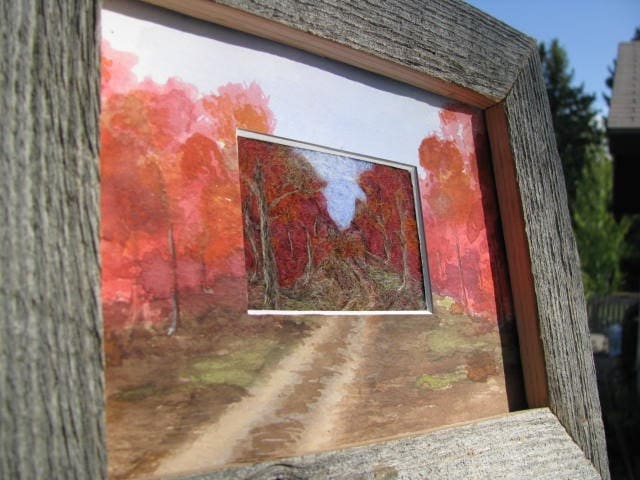
Yikes. We just installed a small woodstove, so I better really think on this one. Well, it would have to be my "Harvest HoneyMOONers" painting, and the "Crimson Passages" (they only count as one, cause they're stored together right now

Saturday, October 11, 2008

"Autumn" NFEST September 2008 Challenge


Collage of all the gorgeous entries for the Needle Felt Etsy Street Team's September 2008 Challenge of "Autumn". Thank you everyone who entered your stunning and diverse creations! (Click on the image to really zoom in on your favorites.)


Orit Dotan Dolls


Ewes Your Imagination


Gourmet Felted


Flights of Whimsy


Nanda Handcrafted


Pitbull Lady Designs


Fufu Kitty


Unwavering Faith


Stay tuned for our next challenge collage of "Things with Eyes" coming in the beginning of November.

Friday, October 3, 2008

Fridays feature, NearlyNoodle


Todays friday feature is

From today onwards the friday featured NFEST artists will be cross posted in the NFEST blog.
http://benmcfuzzylugs.blogspot.com

Any NFEST artist wishing to participate please post in this thread
http://feltingforum.com/phpbb/viewtopic.php?t=2669&start=15


What got you started needle felting?
My friend and business partner Geri Williams

How long have you been needle felting?
15 months

Describe your style of work
Somewhat realistic

How do you promote your items?
Blog,website,etsy

What/who inspires you?
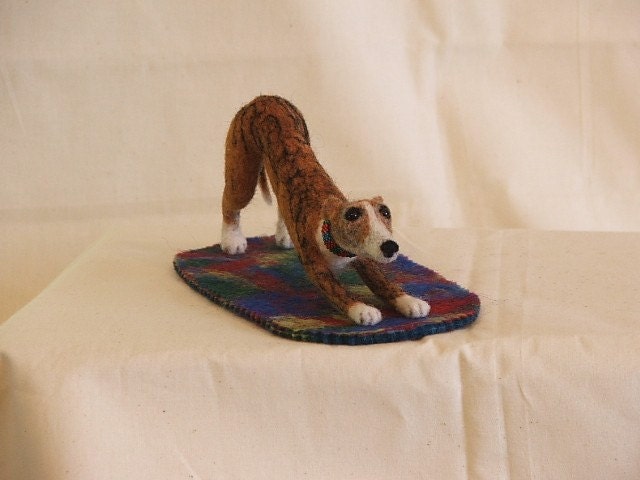
My three whippets


Can you remember what the 1st thing you made was?
A whippet

What are you working on right now?
A horse

If you could only save one of your items from a fire which one would it be?
A moose that I made

Tuesday, September 30, 2008

How-To: Make A Painless Needlefelted Christmas Decoration

Hi! I am Morgan, a.k.a Ewes Your Imagination, a proud member of the NFEST team and the Felting Forum. I asked my mom if she would be the guinea pig for this tutorial, and she happily agreed! About 15 minutes into the project, we had already altered some things, and she was quickly tiring of the stabbing process! Now that I think about it, Dr. Phil was on, and she seemed to be listening less to my instructions and more to the television. I came home and realized there was no way of simplifying all the changes we made, so I sat down and start to finish did this tutorial like I originally planned.

If you have ever pulled out your wool and needles around people who haven't heard of needlefelting, you probably get the same question I get, "Can you teach me?" My answer is usually "No," not only because I am a lousy teacher, but also knowing how much damage a sharp, downward-barbed needle can do to one's fingers. So I hesitate to let the interested kids (and some adults!) I know start stabbing. How do you share the joy of your craft, without sharing the pain?

I wanted to make a Christmas ornament with my mom, who doesn't have any needlefelting experience yet, and thought a good template, or stencil, would be a cookie cutter! I remembered all the fun cookie cutters we used growing up, most of them in Christmas shapes. So we found the standard Gingerbread Man cookie cutter and started stabbing away! The high walls were perfect to run the needle straight up and down without having to put your digits in harm's way.

So if you want to get someone with tender, innocent fingers started in this fun and addictive craft, try some things you have in your house first, and in no time they will pick up the basics of needlefelting.

1) What you'll need: felting needle (I used a size 40), foam,
cookie cutter
with no bar across the top, various colors
of wool roving depending on what you are making.


2) Put your cookie cutter on your foam work
surface, and start laying wool over the top, being
sure to lay wool over the edges, and in different
directions.


3) Push the wool down, and keep adding
more wool until the cookie cutter
is loosely filled with the roving.


4) Start pushing the needle straight up
and down along the perimeter of the
cookie cutter, and continue all the way around, leaving the middle for later.


5) Before you go any further, it's good to
lift up the cookie cutter, and pull the wool
off the foam, so it doesn't get too stuck in
the foam. If you've felted all the way
around the inside edge, it should
hold it's shape well.


6) Now, push the wool back into the
cookie cutter and felt all the wool
in the middle down until it is uniformly felted.


7) Now you can remove the cookie cutter and you should have a semi-firm felted shape.


You can start adding details any way you like, I chose to use
the standard Gingerbread Man embellishments.


You could embellish with beads, sequins, embroidery, or anything you feel like! To make these into hanging tree ornaments, simply sew a loop of thread near the top and tie a knot. Metallic thread looks good for this. The snowman at the top of the page was made using the same cookie cutter, but my mom added some length to the legs after step 6, then gently wet felted, dried and shaped the whole body until it was what she wanted. Then she and I added the carrot shaped nose, and the black eyes and mouth. It resembles a primitive snowman doll she found a while back, and I can't wait to make more!

Also, if you are helping teach someone who is either really impatient, or just really young, you could skip most of the time-consuming steps, and just have them trace the body from a piece of pre-made felt, then just needlefelt the details. They would make good easy hanging ornaments, or even special tags to adorn presents. Happy Felting!